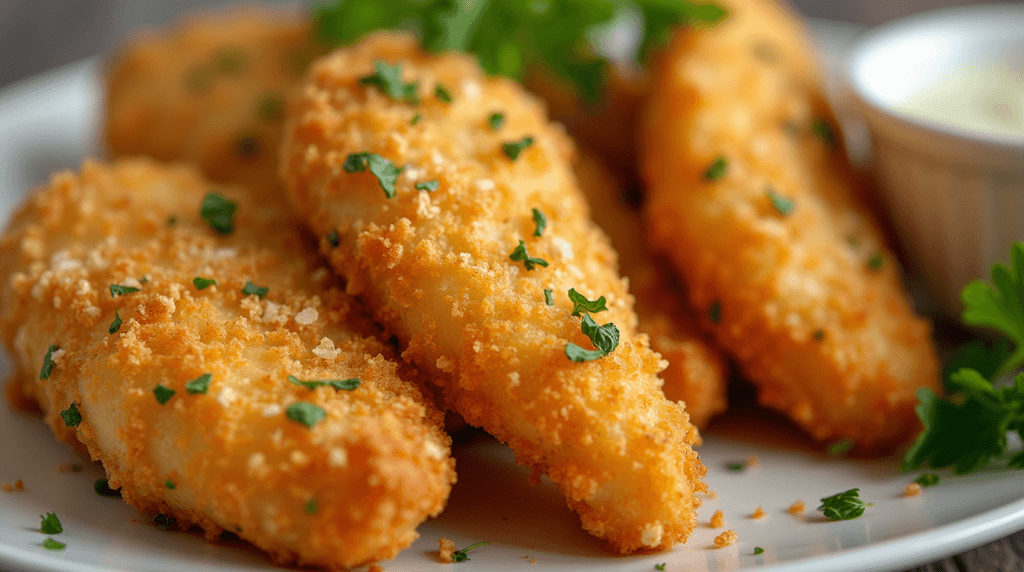
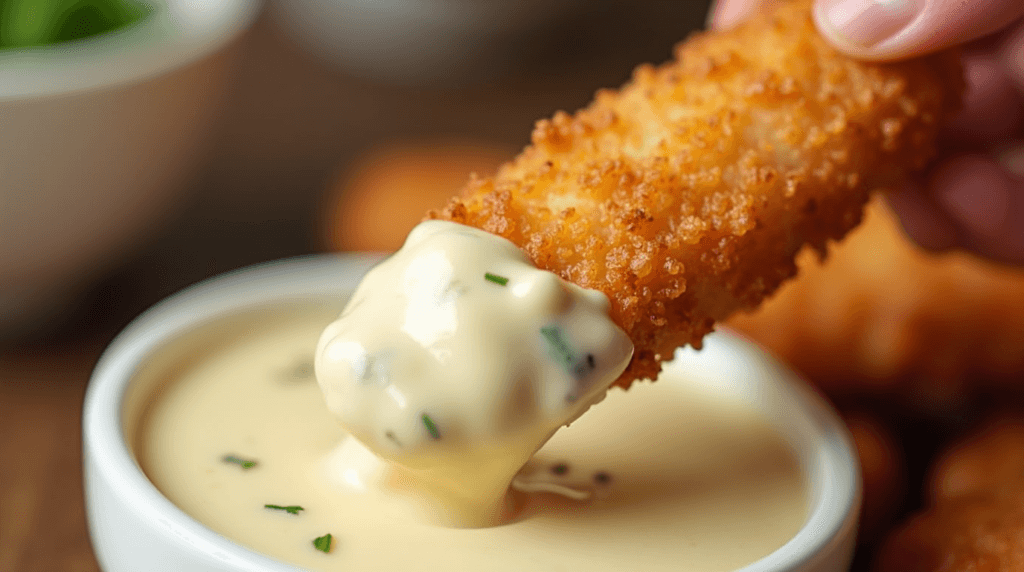
There’s something magical about crispy, golden chicken fingers dipped in a creamy, garlicky cheese sauce. I remember the first time I made these Parmesan Chicken Fingers with Garlic Cheese Sauce for a family gathering.
My niece, who’s notoriously picky, devoured three servings and asked for the recipe. That’s when I knew this dish was a winner. Whether you’re hosting a game night, a casual dinner, or just craving something indulgent, this recipe is a guaranteed hit.
The combination of crispy Parmesan-coated chicken and a velvety garlic cheese sauce is simply irresistible. It’s the kind of dish that brings people together, and the best part? It’s surprisingly easy to make. Let’s dive into why this recipe is so special and how you can recreate it at home.
Why This Recipe is Great
Perfect for Any Occasion: Whether it’s a party appetizer, a weeknight dinner, or a snack for the kids, these Parmesan Chicken Fingers with Garlic Cheese Sauce are versatile and always a crowd-pleaser.
Homemade Goodness: Skip the frozen chicken fingers and make your own. You’ll taste the difference!
Customizable: Use your favorite cheese for the sauce or adjust the seasoning to suit your taste.
Kid-Friendly: Even the pickiest eaters will love these crispy, cheesy bites.
Required Ingredients
Here’s what you’ll need to make this delicious dish:
For the Chicken Fingers:
4 skinless, boneless chicken breasts
1 cup flour
2 beaten eggs
2 cups breadcrumbs (I used panko breadcrumbs for extra crunch)
1/2 cup grated Parmesan cheese
Oil for frying
Parsley for garnish (optional)
For the Garlic Cheese Sauce:
2 ounces light cream cheese
A splash of milk
1 teaspoon minced fresh garlic or garlic salt
1 teaspoon oil
1 ounce good quality shredded cheese of choice (I used sharp white cheddar)
Step-by-Step Instructions
Step 1: Prepare the Chicken
Cut the chicken breasts into strips, about 1-inch wide.
In a blender or food processor, pulse the breadcrumbs and Parmesan cheese until you have a fine crumb mixture.
Step 2: Coat the Chicken
Set up three shallow bowls: one with flour, one with beaten eggs, and one with the crumb mixture.
Dust each chicken strip with flour, dip it into the beaten egg, and then roll it in the crumb mixture. Make sure each piece is fully coated.
Step 3: Fry the Chicken
Pour oil into a large skillet or frying pan until it’s about 1-2 inches deep. Heat over medium-low heat until a drop of water sizzles.
Fry the chicken in batches for 1-3 minutes per side, or until golden brown and cooked through.
Remove with tongs and place on a paper towel-lined plate to drain excess oil.
Step 4: Make the Garlic Cheese Sauce
Melt the cream cheese in the microwave for about 30 seconds.
Whisk in the milk, garlic, and oil until smooth.
Add the shredded cheese and microwave for another 20-30 seconds. Whisk again until smooth, adding more milk if needed to reach your desired consistency.
Expert Tips
Use Panko Breadcrumbs: They create a lighter, crispier coating compared to regular breadcrumbs.
Don’t Overcrowd the Pan: Fry the chicken in batches to ensure even cooking and crispiness.
Adjust the Sauce: If you prefer a thinner sauce, add more milk. For a richer flavor, use full-fat cream cheese.
Double the Recipe: These chicken fingers freeze well, so make extra for future meals.
Creative Ways to Use
Chicken Finger Salad: Slice the chicken fingers and toss them over a bed of greens with your favorite dressing.
Sandwiches: Stuff the chicken fingers into a sub roll with lettuce, tomato, and extra cheese sauce.
Pasta Topping: Chop the chicken fingers and use them as a topping for mac and cheese or Alfredo pasta.
Storage and Freezing Tips
Refrigeration: Store leftover chicken fingers and sauce in separate airtight containers in the fridge for up to 3 days.
Freezing: Place the cooked and cooled chicken fingers on a baking sheet and freeze until solid. Transfer to a freezer bag and store for up to 2 months. Reheat in the oven at 350°F for 10-15 minutes.
Serving Ideas
Occasion
Serving Suggestion
Game Night
Serve with extra cheese sauce, ranch dressing, and celery sticks.
Family Dinner
Pair with mashed potatoes and steamed vegetables.
Kids’ Lunchbox
Pack with a side of ketchup or honey mustard for dipping.
Party Appetizer
Arrange on a platter with toothpicks for easy grabbing.
Final Thoughts
These Parmesan Chicken Fingers with Garlic Cheese Sauce are more than just a recipe—they’re a memory-maker. Whether you’re cooking for your family or entertaining guests, this dish is sure to impress. The crispy, cheesy chicken paired with the rich, garlicky sauce is a match made in heaven. Give it a try, and don’t be surprised if it becomes a regular on your menu!
Description These Parmesan chicken fingers are dipped in a homemade garlic cheese sauce. Everyone loves these chicken fingers! Perfect appetizer.
Ingredients
4skinless
boneless chicken breasts
1cup flour
2beaten eggs
2cups breadcrumbs (I used panko breadcrumbs)
1/2cup grated Parmesan cheese
Oil for frying + parsley for garnish
2ounces light cream cheese
a splash of milk
1teaspoon minced fresh garlic or garlic salt
1teaspoon oil
1ounce good quality shredded cheese of choice (I used a sharp white cheddar)
Instructions
1
Cut the chicken into strips. In a blender or food processor, pulse the crumbs and Parmesan until it’s a fine crumb mixture.
2
Put the flour, egg, and crumb mixture in individual shallow bowls. Dust each strip of chicken with flour, dip into the beaten egg, and roll in the crumb mixture. Coat all pieces before you start frying.
3
Pour oil in a large skillet or frying pan until it’s a few inches deep (enough to cover the chicken on one side). Heat over medium low heat until a drop of water sizzles in it. Add the chicken in batches and fry for 1-3 minutes until they reach desired golden-brownness. Make sure to fry long enough to cook each piece all the way through. Remove from oil with tongs and place on a paper towel lined plate to drain the oil. Let cool slightly.
4
For the cheese sauce, melt the cream cheese in the microwave for about 30 seconds. Whisk in the milk, garlic, and oil until smooth. When smooth, add the cheese. Melt for another 20-30 seconds and whisk again until totally smooth, adding more milk to thin out the sauce to your desired consistency. You can also do this on the stovetop – I’ve done it both ways..
Note
Notes
Make extra sauce if you’re planning to serve more than 3-4 people.
And if you love salt, sprinkle the chicken fingers with coarse sea salt just after removing them from the frying pan. Ohhh yeah.